3D Vision fix for Grim Dawn in DX11 mode, with lots of hotkeys that improve playability. It includes "dynamic" crosshair options (check the F8 and numpad hotkeys).
Important update (2018-02-23): the game update 1.0.5.0 changed the hash of most shaders, so I had to do the fix again. This time using regex to avoid this problem in the future. Only the HUD shaders are manual (they didn't change). Download the fix again from the installation instructions, and if you still use or roll back to game versions below this one, get the old fix here.
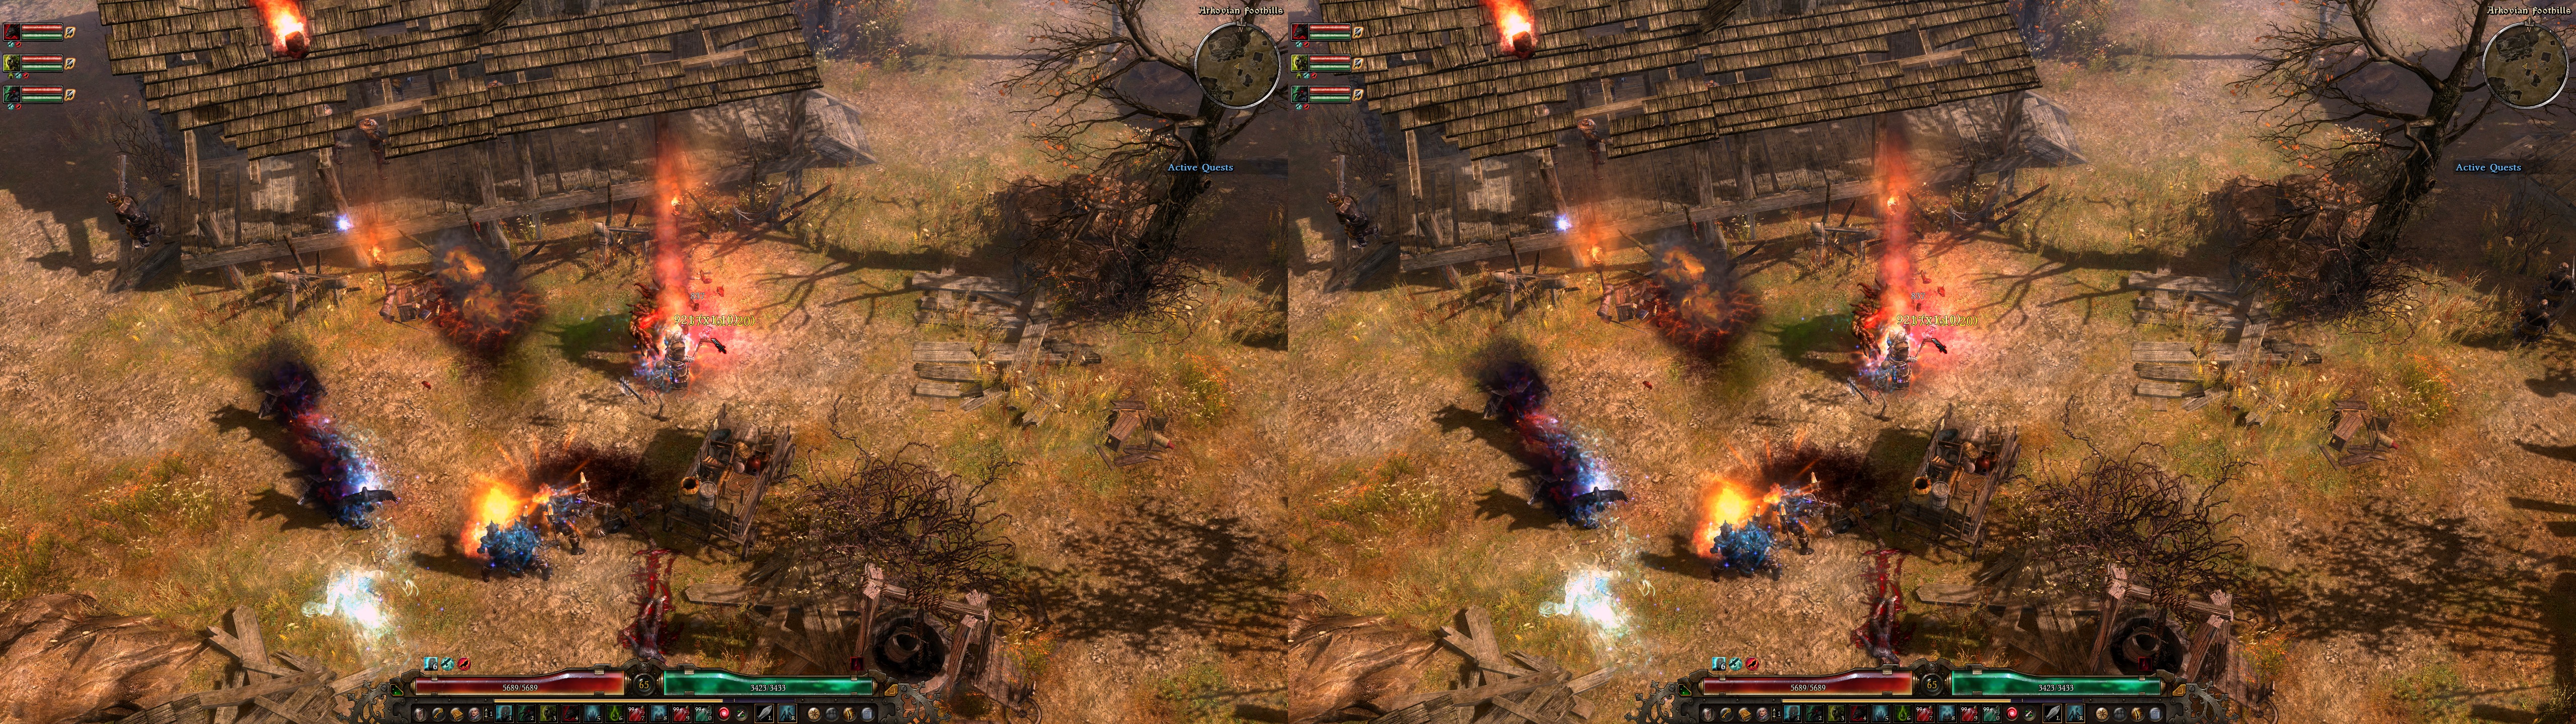
Note: the devs increased the resolution of special effects. Switch your settings around if you don't see them in higher resolution yet (I had to do that).
Update (2017-12-23): fix reuploaded to use 3Dmigoto 1.2.68 build. Good performance increase.
Update (older) (2017-10-30): fix reuploaded to use an official 3Dmigoto 1.2.67 build.
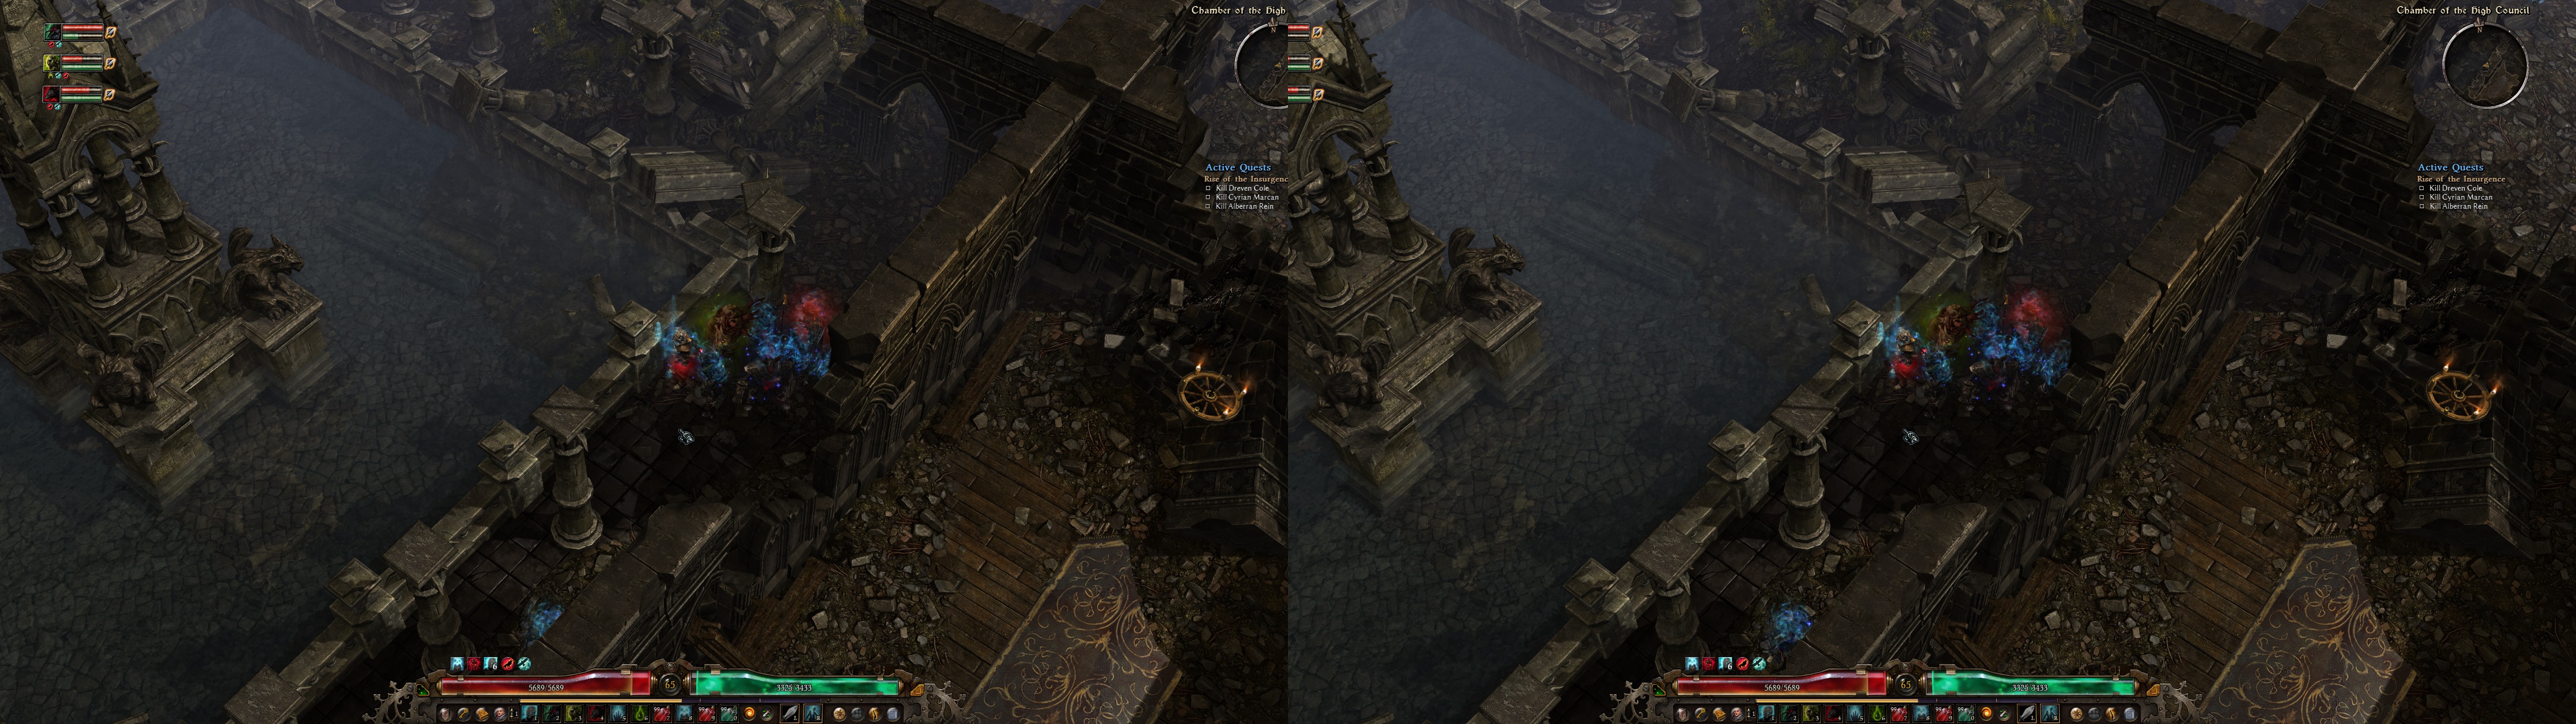
Fixed and stereoized
- Water reflections at all graphics settings levels.
- Fire, spells effects, blood, acid, rifts... All special effects in the game.
- Post processing.
Known issues
- Aether crystals and a certain kind of glass don't seem to have the correct fixing formula, which works in this same shader for other effects (transparency of ghosts, for example).
- You'll have to make a choice about post processing and HUD depth, which I explain in the installation steps.
- The mouse cursor will be darker than without the fix, and will show a small blue square surrounding the store icon when you place the cursor over a merchant. This doesn't affect gameplay in any way.
- When talking to NPCs, their faces appear in a window that has fixed depth and its content is sensitive to convergence. A bit annoying but I didn't find a way to fix it (it uses the same render target as the main game so I can't make it 2D).
Installation
- Download this file and extract its contents in the "Grim Dawn" folder (it's the root folder), where "Grim Dawn.exe" is.
- If you aren't going to use post processing ingame, skip the next step and ignore all hotkey warnings.
- Important for post processing: using any kind of HUD depth (not counting mouse cursor) will break this effect, making bloom be at wrong depth. Check the "minimap with depth" and "minimap for post processing" folders I included. Here you have to choose. What do you prefer, post processing (which makes the game more colorful and bright) or more HUD flexibility? By default, the "minimap with depth" shader is included in the "ShaderFixes" folder. Overwrite it with the other if you want to use post processing in the game and avoid some big issues if you use the HUD toggle or HUD depth presets. If you change your mind after you ran the game at least once, you'll also have to delete the "2ebcf4b62c217ddc-vs_replace.bin" file inside "ShaderFixes".
Why the choice? The "minimap for post processing" shader fixes a big extra problem (that happens if you move the HUD into depth), but the side effect is that the minimap remains at screen depth. That's why I recommend the "minimap with depth" shader if you don't post processing or if you use it but don't touch HUD depth.
- Boot the game.
- Once inside the game, hover your mouse over any NPC to fix ambient occlussion (apparently not needed if you don't use MSAA, or if you don't use ambient occlusion, obviously).
Hotkeys
- F1: five convergence presets.
- F2: HUD depth presets. Screen depth by default. Warning: don't use if you use post processing.
- F3: HUD tilting presets. Warning: don't use if you use post processing.
- F4: HUD and mouse cursor toggle. Not disabled by default. If you don't want it to toggle the mouse cursor, open the "ShaderFixes\mousevs.hlsl" file and delete the "pos.x=pos.x*iniparams.z;" line. Warning: don't use this hotkey if you're using "minimap with depth" AND post processing. Using "minimap for post processing" and post processing will make it disable bloom, apart from the HUD.
- F5: distance fog toggle, if you want better visibility in some locations. Not disabled by default.
- F6 (obsolete because of the F8 hotkey): five manually tuned convergence, and HUD + cursor depth and tilting presets. Made for maximum zoom distance. The F8 hotkey is better. Warning: don't use if you use post processing.
- F8: three presets that make HUD and/or cursor depth convergence dependant, making them be a little bit above ground level with dynamic depth and tilting (for improved mouse use). The first press will make only the mouse cursor be at depth. The second will make both the mouse cursor and the HUD be at depth (Warning: don't use this preset if you use post processing.). By default, it's tweaked for maximum camera zoom.
- NUMPAD1: it changes the values that the F8 hotkey uses, for minimum camera zoom.
- NUMPAD2: it changes the values that the F8 hotkey uses, for default camera zoom.
- NUMPAD3: it changes the values that the F8 hotkey uses, for maxmum camera zoom. These are the default values.
- b: hold this key to temporarily revert to the default F8 preset. Useful when you want to interact with menus while you only use mouse cursor dynamic depth.
Those numpad hotkeys are the default keys for their related camera zoom presets inside the game options.
Recommendations
- For easier use, I recommend just using the default shaders and not use post processing. Then press F8 twice (to have loot tags at ground level and all HUD at the same depth as the mouse cursor) after loading your character.
- Limit your fps to 60 in RTSS to have less mouse input lag.
- If you use the HUD only at screen depth, it's better if you set "rasterizer_disable_scissor=0" in "d3dx.ini", to avoid quest log and world map overflow.
I'll update the fix if a game update breaks it. To notify me about it or to ask questions, better post a comment here: https://forums.geforce.com/default/topic/663259/3d-vision/grim-dawn-arpg-fantastic-/1/
If you liked the fix and want to contribute for more future fixes, you can donate to this PayPal account: masterotakusuko@gmail.com
The best article sir, I hope you are always healthy GBU
ReplyDeletejudi pulsa terpercaya